Most people believe that upgrading LED ceiling lights requires calling an electrician or replacing the complete fixture. I can tell you that’s not always the case because I’m an LED lighting engineer. Sometimes it’s as easy as changing a lightbulb, and other times you might need help from a professional. The objective is to comprehend the current situation.
During my time in LED product development and installation consultancy, I met a variety of lighting difficulties and solutions. From home to commercial applications, I’ve learned about typical difficulties and, more importantly, how to solve them efficiently. Let me explain all you need to know.
Is it possible to change LED ceiling lights on your own?
Finding out what kind of LED light you have is the first step. Take a peek at your ceiling: is there a traditional-looking bulb beneath a cover, or is it a flat panel with no apparent bulb? This basic observation reveals a lot about what you’re dealing with.
Types You Can Usually Replace Yourself:
- Standard LED bulbs in traditional fixtures
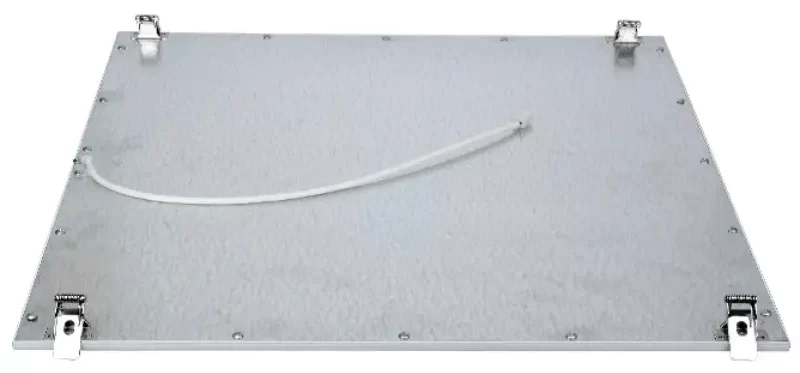
- Simple LED panels that attach with spring clips

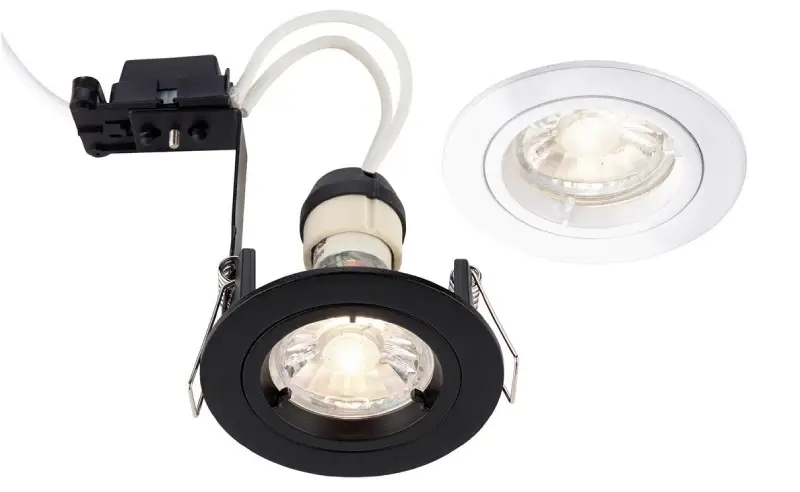
- Basic LED downlights with twist-lock mechanisms

You might want to get in touch with an electrician if you observe:
- Loose or damaged wiring
- Signs of burning or overheating
- Multiple lights failing simultaneously
- Complex integrated systems with controllers
What You’ll Need for the Job
Before you ascend the ladder, be sure you have everything prepared. There is nothing worse than learning you’re missing something crucial halfway through a task.
Must-Have Tools:
- Voltage tester (never skip this!)
- Flathead and Phillips screwdrivers
- Wire strippers and pliers
- Step ladder
- Work gloves
- Basic wire connectors
Here’s an expert advice from years of fieldwork: always keep electrical tape on hand. Even with sophisticated wire connectors, adding an extra layer of protection can help prevent future issues.
Safety Equipment You Should Not Ignore:
- Safety glasses (especially when working overhead)
- Non-conductive ladder if possible
- Phone within reach for emergencies
You might also find these helpful, though not essential:
- Headlamp or work light
- Helper to hold the ladder
- Small container for screws
- Circuit finder
Replace LED ceiling lights in 5 steps
Safety First (This Part is Non-Negotiable)
- Turn off the powerYou should go to your circuit breaker rather than just the switch. I’ve seen far too many DIY projects go wrong because someone trusted a wall switch. Electricity does not provide second chances.
- Test for powerApply your voltage tester to the wires or fixture. Test twice. This may appear overly cautious, but if a “dead” wire unexpectedly shows voltage, I always double-check.
For Replaceable LED Bulbs:
This is the simplest case. If you see something that appears like a typical bulb, here’s what you can do:
- Allow the old bulb to cool completely
- Remove any coverings or shades
- Check to see if your bulb twists out or has clips
- Install a replacement bulb with the same type and wattage
When purchasing a new bulb, consider both wattage and color temperature. Combining warm and cool lighting in the same space is a common error I see.
For Integrated LED Fixtures:
This is where most people become nervous, yet it isn’t as complicated as it appears. Allow me to walk you through it:
- After checking that the power is off, remove the cover.
- Check for mounting screws or spring clips (typically 2-3).
- Lower the fixture carefully; do not let it hang by the cables.
- Take a photo of the wire connections (believe me, this little step has saved me numerous hours).
Wiring Guide:
- Black connects to black (hot)
- White connects to white (neutral)
- Green or bare copper is ground
Wiring colors may differ by area. If you find different wire colors and are unsure, see an electrician; wire connections should not be guessed at.
Installation Steps:
- Disconnect old wires (one at a time)
- Remove old mounting bracket if necessary
- Install new mounting bracket if included
- Connect wires using wire nuts
- Tuck wires neatly into junction box
- Secure fixture to ceiling
Common Problems & Quick Fixes
Let’s address the most common difficulties I see:
Light Not Working After Installation
- Double-check the wire connections
- Ensure the fixture is compatible with your voltage
- If you use a dimmer, be sure it’s compatible.
Flickering Issues
- Improper connections: One of the most common causes is improper connections. When this occurs, you ought to shut off the electricity and check every connection carefully.A proper connection requires the appropriate wire nut and wires that are tightly twisted together.
- Incompatible dimmers: Incompatible dimmers are another common issue. Check to see if your dimmer is specially rated for usage with LEDs. Make sure the wattage range of the dimmer matches that of your LED lights – this is an often-overlooked but critical aspect.
- Voltage fluctuations: Voltage variations might also result in flickering. In these circumstances, installing an LED-compatible voltage regulator frequently resolves the issue. This is especially crucial if you see several lights flashing at the same time.
Loose Connection Symptoms & Fixes
- Lights working intermittently: If your lights work intermittently, it is most likely due to a connection issue. Check all of the mounting screws and make sure the wire connections are snug under the wire nuts. A good connection should feel strong and secure.
- Fixture feels wobbly: When a fixture feels unsteady, look for the mounting bracket. Verify that it is firmly attached to the junction box and that all of the mounting screws are positioned correctly.A loose junction box might require additional support.
- Buzzing sounds: Buzzing sounds are often indicative of installation issues. First, make sure the fixture is tight against the ceiling. Verify that the dimmer you’re using is LED compatible.Internal components can occasionally go loose; these can typically be tightened, but handle with caution.
Remember: If the flickering remains after attempting these repairs, or if you hear weird sounds, there may be deeper electrical concerns that necessitate professional care.
Frequently Asked Questions
- “How to replace LED strip ceiling lights?”
Strip lights might be more difficult to work with than traditional fixtures. Although the technique is identical, you will need to:
- Remove the old strip carefully to avoid harming the surface
- Thoroughly clean the mounting region
- Ensure the new strip matches the power supply
- Upgrade to a more recent model with better adhesive.
I’ve seen numerous DIY projects fail due to insufficient surface preparation. The glue requires a clean, dry surface to hold.
- “How many years do LED ceiling lights last?”
Most manufacturers claim 50,000 hours (about 15-20 years of average use). However, let us be realistic: in my experience, decent LEDs often survive 5-7 years with good installation. Several variables influence this:
- Operating temperature
- Usage patterns
- Power quality
- Installation method
- “Do you need to change wiring for LED lights?”
Usually not. Most current LED fixtures are compatible with ordinary residential wiring. However, if you’re replacing really old fixtures or changing fixture kinds, you may require upgrades. Watch out for these warning signs:
- Very old wiring
- Missing ground wire
- Aluminum wiring
- Outdated junction boxes
Final Thoughts
The most successful LED installations I’ve seen all have one thing in common: they were completed with the proper preparation and understanding. Whether you choose to do the replacement yourself or seek professional assistance, you now have the knowledge to make an informed decision.
For customers seeking extra peace of mind, our staff offers expert advice on selecting the proper fixture as well as comprehensive installation support. Contact us for a consultation; we will ensure that your lighting upgrading goes smoothly.
Stay safe, and happy installation!
Note: Please keep in mind that this tutorial is primarily intended for reference purposes. Installation requirements and electrical codes differ by region. If you are unsure, always contact local legislation and experienced electricians for particular advice.


